
Table of Contents
Beginners Guide
What is going to be covered?
- Creating a post
- Adding paragraphs and images/galleries
- Uploading videos onto YouTube
- Embedding a YouTube video onto a post
- Selecting the category and publishing your post
Creating a post
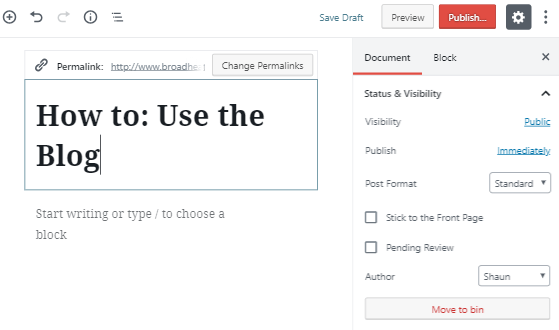
There are many ways to create a post.
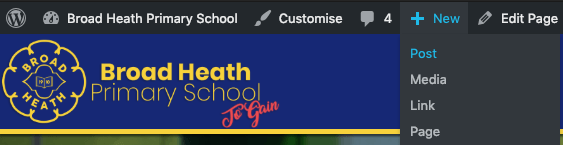
The fastest way to create a blog post is by being logged onto your account, and clicking the “+ New” on the banner at the very top of the page. If you don’t see this, you must not be logged in.
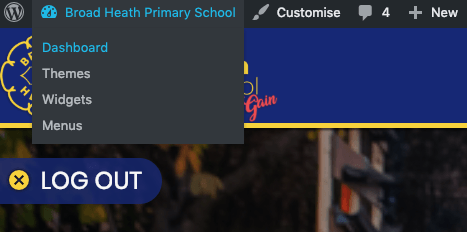
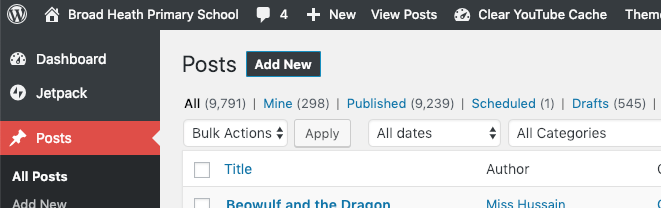
Another way is to do it through the Dashboard. You can find the Dashboard by clicking here:
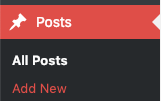
Once on the Dashboard, you can click either click onto ‘Posts’ and clicking ‘Add New’ or clicking onto ‘Posts’ and being redirected to the posts page and then clicking onto the ‘Add New’ button at the top.
Once done, you can now start the creation of your blog post!
Adding paragraphs and images/galleries
Paragraphs construct your blog, you will be using these to write your text and information. Images or galleries can be used to make your blog stand out and work more effective, such as including work from the children or showcasing something that has happened.
To add a paragraph/image block you must click on the plus at the top right – or you can click next to the block on the post.


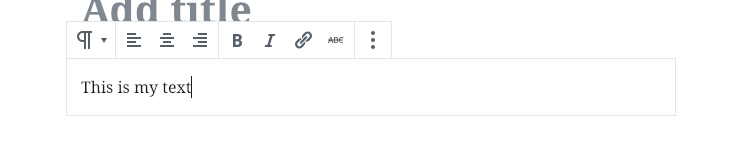
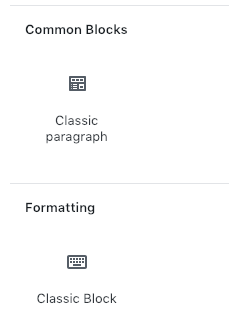
You then want to find ‘Paragraph’, this can be found in the ‘Common Blocks’ area or you’ll find it in the ‘Most Used’.
Once you’ve added that block, you can then type your text.
You can also add images/galleries the same way. Click onto the ‘Add Block’
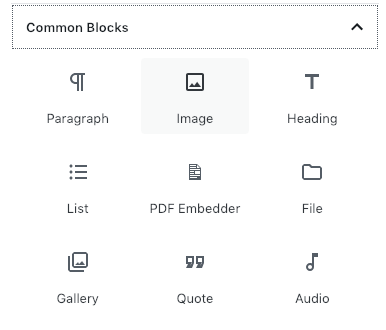
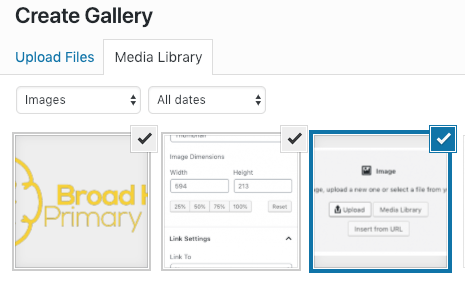
You then want to select Image or Gallery, depending on the content you’re adding. If you want multiple images, I would recommend the Gallery as it’s a cleaner alternative to having huge images all over the post.
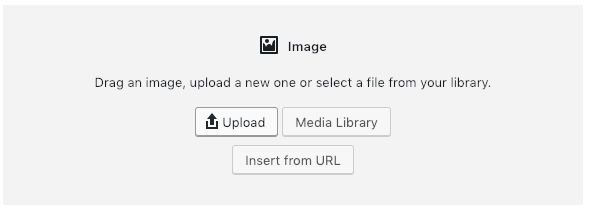
You can choose to upload the picture from your computer/iPad. You can also use the media library of all the photos from our website.
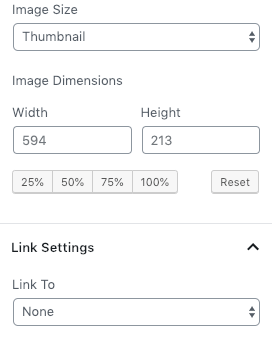
There are a few different settings you can choose for images and galleries. Image size is the quality of the picture, for the best result always use Full Size or Large. Image dimensions are used to make the image fit your blog, you can chose to have an image at 10% of it’s size, 25%, 50%, 75% or 100%.
A tip is to not touch these settings unless you have to as the Image Size will do it for you.
To create a gallery you must create the block, and then select multiple pictures.
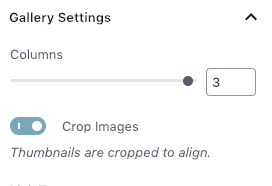
Some of the settings for the gallery allow you to choose whether you want a number of photos per row.
Formatting paragraphs
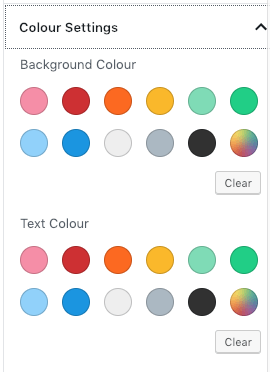
There are a lot of cool things you can do with the paragraphs, one of the best things is allowing the ability to have the block in a separate colour.
This allows you to make a
R
A
I
N
B
O
W
You can do this by clicking on a paragraph block, and locating the Block settings on the right side and clicking the Colour Settings drop down.
Uploading videos onto YouTube (outdated)
There are many ways to upload a video onto YouTube, but we will cover the method we will be using the most at BH. Through an iPad!
The easiest way to upload the video you just created with iMovie is doing it from inside the app. You can do this by going opening your iMovie, and clicking the Share button.
INCL IMAGE
It may prompt you to log in, you can find the details by speaking with Seb or Shaun.
INCL IMAGE
YOU MUST MAKE SURE THAT YOU UPLOAD THE VIDEO FROM THE BROAD HEATH ACCOUNT – THE VIDEO MUST ALSO BE SELECTED AS UNLISTED.
This prevents anybody outside of our website from being able to see it. This is very important.
INCL IMAGE
Now you can proceed in embedding the YouTube video onto a blog.
Embedding a YouTube video onto a post
To get your newly uploaded video onto the blog, you first must grab an embed code from the video.
You can do this by clicking Visit Link after you’ve posted the video.
INCL IMAGE
Next you will need to find the embed button underneath the video and copying the code.
You will then need to post that code directly into a blog. Once this is done, it should automatically do the magic for you and embed it directly into your post!
INCL IMAGE
Selecting the category and publishing your post
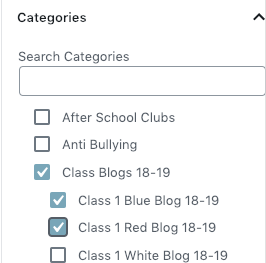
To get your blog to show in the right areas, you must first select a category for it to be posted.
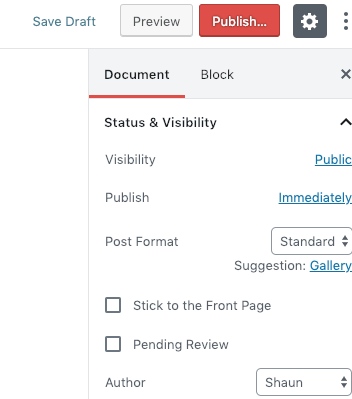
You can do this by clicking on the Document settings on the right hand menu.
Clicking the Categories dropdown (if not already open) and you can search for your class blog or other areas you may want to post.
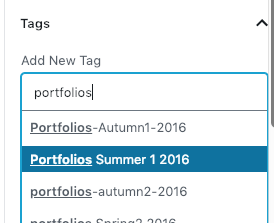
You may also want to have a tag, this is used when you make Portfolios.
Once you’ve got everything set, you want to click the big red Publish button.

Well done, you’ve completed the beginner guide and just posted your blog!
Back to the Table of Contents.
Intermediate Guide
What is going to be covered?
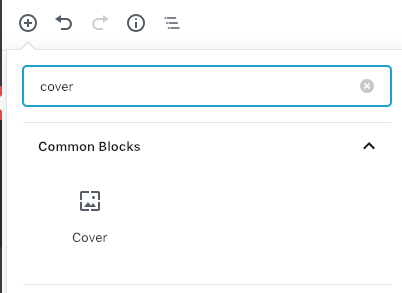
Adding a cover image
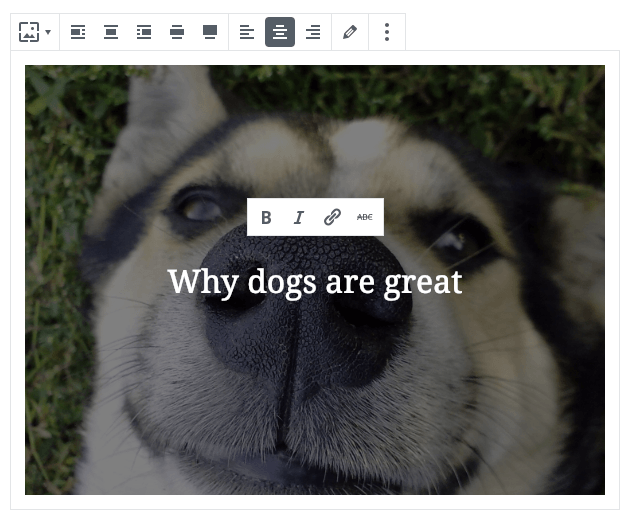
Cover images, similar to an image have the ability to add a title on top of it.
This shouldn’t be used to showcase work, but should be used as a form of banner.
You can add a cover image to your blog post by going onto your blog, and clicking on the Add New Block (+).

It’s the same as adding an image, you want to choose your media. You can then modify the text in the center of the image.
There are a few settings to mess around with on the cover image. You can choose whether the image is fixed to the page (when you scroll it will stay in the same place) and even change the image opacity (this will aid in being able to see the text on top).
You can find these settings on the right hand side menu under the Block Settings.
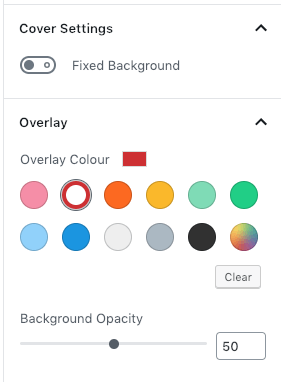
The higher the opacity the more transparent the background goes over the background colour.
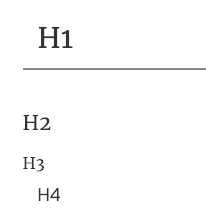
Using Headings
Headings are used to break up the huge amounts of paragraph text with a bigger and different looking font.
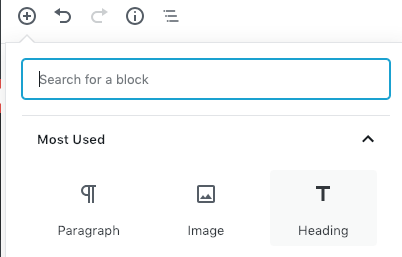
To create a heading, you want to add a new block and selecting Heading.
You can then take a pick of 4 different header styles, all of which look different to the other (H5 and H6 don’t do anything special).
H1 has a underline across the page. H2 is big text. H3 has an indent outward and H4 has an indent inward.
You can also use anchors on headings to use as a jump-to link. This is what is being used in this guide!
You can set this by going to the heading settings and finding the HTML anchor setting.
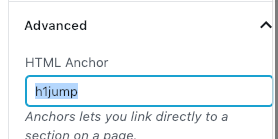
You can then link a paragraph or anything on your blog (image, etc) and use the link as the jump-to. The link would look like “#h1jump”.
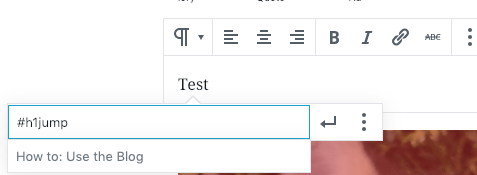
This should make the link you click take you to that part of the page.
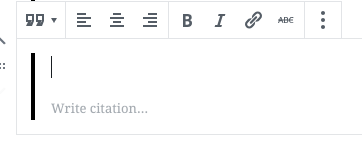
Using quotes
There are two different quote styles to be used. You can use the Pull Quote which is a larger quote and is centered into the page. There is also a more subtle quote called Quote.


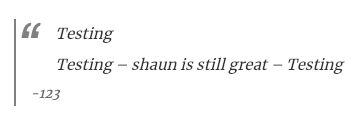
When you add the block, you will then be able the text and the citation
Each quotes have the ability to change their style. The Quote is more plain and the only thing you can change is the text size.
You can find the block settings to the right of the page.
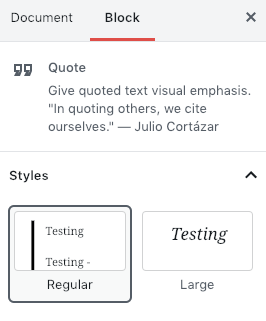
The Pull Quote allows you to change the colour of the borders and the text inside the quote. There is also another style that changes the quote into a solid colour instead of the borders.


Using media & text
An age old problem with the blog is you have never been able have text alongside an image.
Now you can with Media & Text!
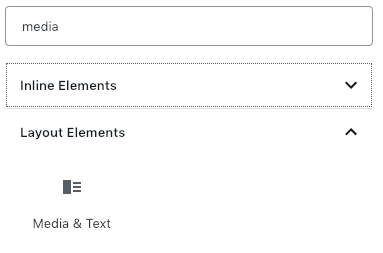

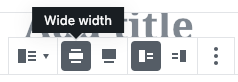
When you insert the block, you have the option to add an image and the content text.
Before you proceed, make sure you uncheck the align-wide button (this is currently broken on the blog and will make it look very weird)
Once you have selected your image and input the text you want to show next to it, it should look like this:

Broad Heath Primary
You can also flip what side the media and text are on. By default it’s left.
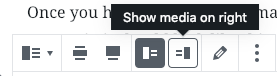
This should result in this:
Broad Heath Primary
Utilizing the classic block
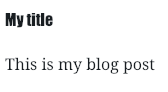
The Classic Block is what was the original editor last year. The best thing that can be done with the Classic Block/Classic Paragraph is the ability to change the font of the text.
To add a classic block, you want to click the (+) and search “classic”. Two blocks should come up, but they are both the same.
Once you have added this block, you should see some strange settings appear on your block editor.

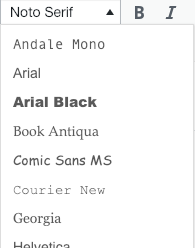
The area we are going to look at is the font-family. In from the screenshot above it should show Noto Serif; if you click that you should be shown a huge list of fonts to choose from.
Once you’ve selected your font, you will want to write your text.
Well done, you’ve completed the intermediate guide!
Back to the Table of Contents.
Advanced Guide
What is going to be covered?
Adding tables
Tables can be used as a different way to layout challenges or a set of tasks.
For example:
| Bronze | Silver | Gold |
| To log in | To post a blog | You conjure up a spell |
| To create a blog | To embed a video | To slay a dragon |
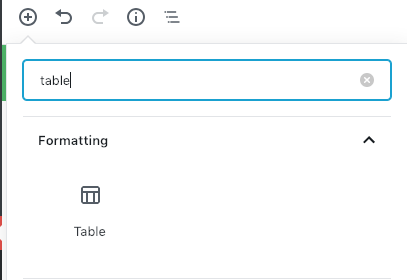
To add the table block, you need to click the (+) button and search for “table”.
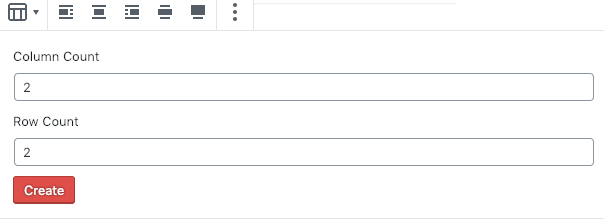
You will then need to add how many columns and rows you would like (columns are to the right and rows and down).
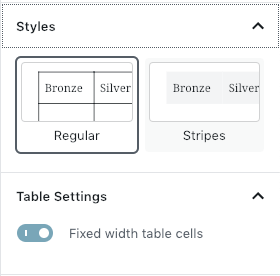
Once you’ve added your table, you are able to choose from a few styles. My favourite is stripes.
Also make sure you click Fixed Layout so your table isn’t a mess.
Embedding a PDF
This is one tool a lot of people would like to learn. This has become a lot easier with the new editor as there is a block made for this!
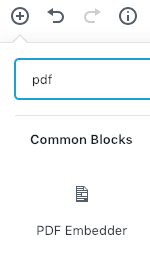
Click on the (+) button and search for “PDF”.
Once the block is added. It should look like this:

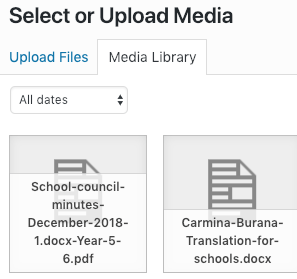
You will want to click on the text, and you can choose whether to upload the PDF or select it from existing ones on the blog.
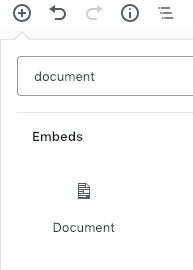
You can also embed a word document using a different block called Document.
You can find this by searching “document” in the search bar and adding it.
You then want to click “Add Document” and a menu will come up.
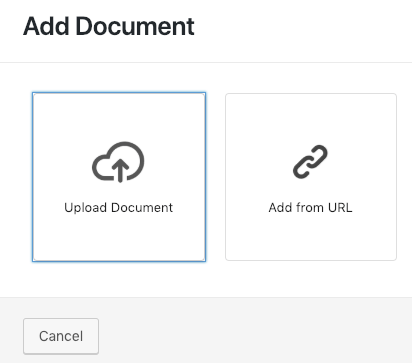
You will want to click “Upload Document” and follow the previous steps.

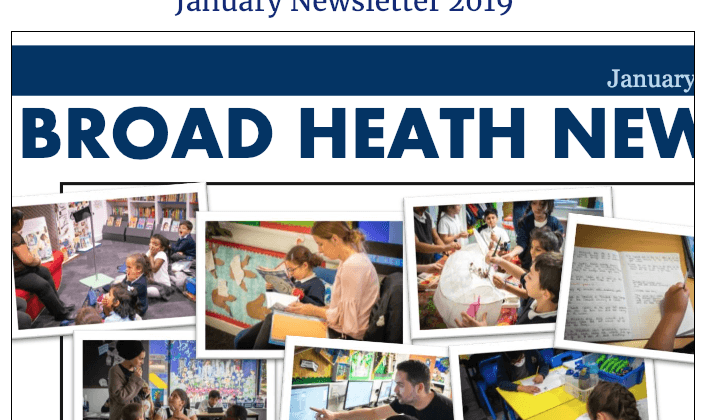
Your document should now be embedded into your post. Have a look by using the Preview button at the top right. Your blog should look like this:
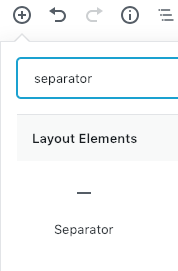
Using separator
A separator is a good way to break up your document without breaking a different page/blog.
To add a separator, you need to click the (+) Button and search for “separator”.
There are 3 different styles for the separators
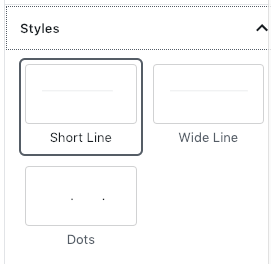
Short Line (Default):
Wide Line:
Dots:
Great way to break up your work without using huge spaces.
Adding a page break
A page break is a way you can split your blog post into multiple pages.
You will want to add your page break after the end of a section you’d like to split. Whatever is below your page break will be on the next page.
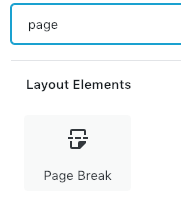
A page break will look like this in the editor.

But it will result in this on the blog:

The blog should then be slip from the page break downward. Whatever is underneath the page break will be on a separate page (this includes multiple page breaks)
Using columns (difficult)
Columns allows you to essentially have splits down the page. This means you can do funky stuff like this:
Bronze Challenge
To do this

Silver Challenge
and that

Gold Challenge
and these

The column can be very clunky to use but can sometimes have a good payoff.
What the column block does is add multiple mini blocks within a block, this allows you to have multiple blocks on one line at a time e.g. images, paragraphs and more!
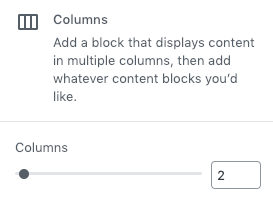
To add a column block, click the (+) Button and search “column”.
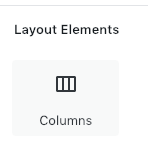
Once added, it should look like this:

You can then choose how many columns you’d like. For the best result, I’d use 2-4. The higher the number, the more difficult it becomes to manage.
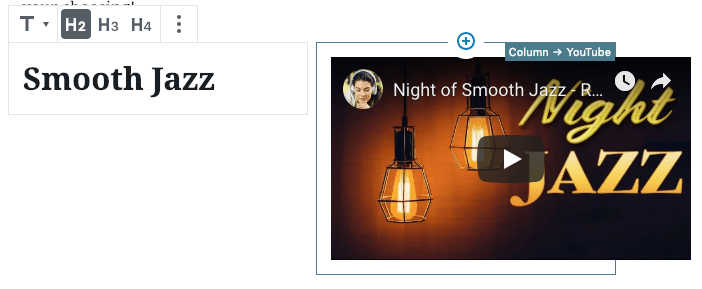
You can then click on the (+) icons within the column to add any block of your choosing!
Editor view:
Blog preview:

You can then Preview your blog to see if the formatting worked. If it did, then you have successfully added a column into your blog.
Well done, you’ve completed the advanced guide!